Kristin Peterson: mixed media, collage, painter, artist
Showing posts with label book paper. Show all posts

Monday, January 19, 2015

#DLP {first challenge}

i finally got to play in the studio this weekend after a busy week. so i started with my Documented Life first challenge that was "book paper."


book paper.....mmmm....i don't like book paper at all {NOT}. i was super excited to see this challenge, but, almost had a hard time not using everything i could lay my hands on; but, i love the mix of paper that i did use.

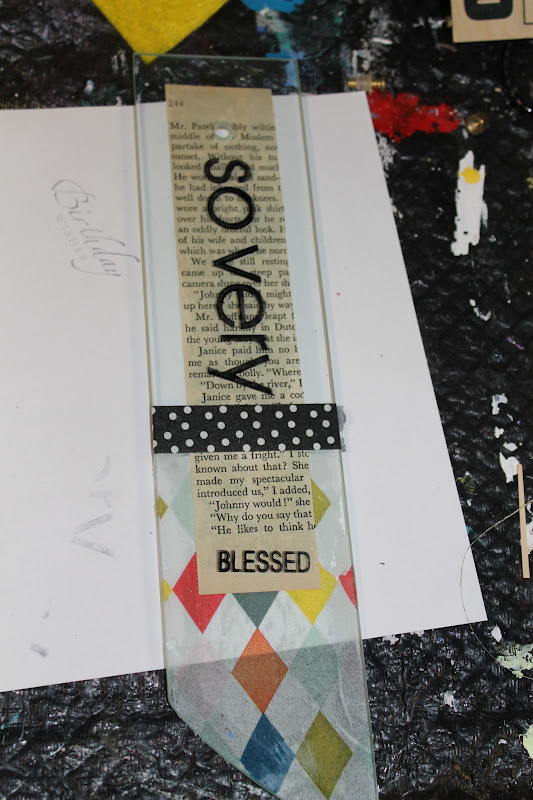
i used some book paper and pieces of map that had been painted and cut into circles- those are running across the top of my pages. let's take a peek....


i used a variety of products on these pages and had started with gesso as my base and i am using the recommended Dylusions art journal book.


happy monday!

Thursday, September 27, 2012

turning "finds" into charms

in town we have these clothing collection metal bins. someone apparently did not understand the "clothing only" and there was stuff outside of the bin. so when i ran to the grocery and had come to the stop sign and glanced, over....my eye was caught by this sparkling item that had been left there. the junker in me kicked in, and going around the block gave my mind just long enough to think of the potential that this item may hold. so i went back and grabbed it.

i wish the pieces there straight across at the bottom, but, hey, sometimes you need to roll with the punches and not look a gift horse in the mouth! so this is the first mixed media "charm" i made. i am not sure about the book paper, but, i definitely like the diamond napkin and the black and white polka dot washi tape.

yes...definitely like the diamonds....can't wait to make more charms. my plan is to hang the charms with ribbon. what are your thoughts on this charm? let me know what you think! thanks for visiting and comments!

Sunday, May 27, 2012

all that's left is the party.....

it's go time here in this household! d-day! we determined that this small scoop (the kind you find in the kool-aid or lemonade mix) if filled below the top of the scoop was the right amount to fill our tubes. i first cut the ribbons that were going to be used as ties so they were ready to go. then, i pulled the saran wrap out- i suppose my hunks were probably about 6-7 inches wide; then, dumped my scoop of M and Ms onto the saran wrap...gather up the edges, tie, and poof- filler complete!! 

once all the fillers were complete, i grabbed the tubes, tied one end and slipped the candy inside. i maybe should have trimmed the saran wrap, but, i did want people to realize there was something inside- so i left it. i was trying to streamline the process a bit, and no trimming- one less step. so unless you are really anal- then, you can trim away! with the candy inside, tie the other end and this is what it will look like.

this is my final product....boom! (with my arms up and an air chest bump...) grad party favor!! if you have a friend or two that is willing to help, this process really isn't too bad. we did the party favors in stages, so if you have visited this blog before, you may have seen the mountain of toilet paper rolls in book paper in the last week or two...we didn't want to fill with candy and then have them sit, so we just got completely finished yesterday. we only made 150- sometimes you have to set the limit and the early party people will get the party favors!
all that's left is the grad party!! it should be a heck of a day!

Tuesday, April 24, 2012

graduation invites

this is my first batch....

i did use chalkboard paint for the black swipe across the front. vintage book paper for the circles and scrapbook paper for the colorful strip along the left side. the no. 2012 is stamped in white craft  ink and sprayed with a fixative to stay put. ;)

i also used green india ink on the fronts and backs along with a gold glimmer mist. you can appreciate the glimmer mist better here on the back. and my husband is always telling me "it's good to be the king" so when i found that stamp, i had to have it- and it is perfect for the graduation cards! it is stamped in grey.

i did sew along the papered edge as well with a white zigzag and a black straight stitch for a little texture. i did not trim the threat close- choosing to let the threads come shortly off the page. my plan is to place his picture on the top half of the card and the information for the open house on the bottom. i did also "do" the envelopes. the scrapbook paper was so cool and had such nice colors that i had a left over piece that fit nicely on the envelope.

and check this out.....so yesterday morning at about 510am, my vintage old oak table that i have had forever decided it had had enough!! and broke in thirds! the loud crash of course woke me up. i came down thinking i was going to be mad at the cat, and was looking around, couldn't find anything until i turned around and really looked at my table, and then said "holy crap, my table broke!" what a way to start the day!

Thursday, April 19, 2012

graduation card teasers

i went to my mom's studio space yesterday and we sweatshopped it making graduation cards yesterday. we punched 2 different size book page circles.

i used a swipe of chalboard paint on the cards.

we then followed up with drips of grass green ink and sprays of gold glimmer mist. we got close to finishing yesterday but, not quite. so this is a tease of what we were using.....hope you will stop back to see the finished product very soon! happy thursday!